Hydro dipping is a really cool technique you can use to give your Yeti tumbler cup a completely unique design. It can be done at home with a bucket of water and spray paint and can give some amazing psychedelic effects when done properly.
The steps and instructions on how to hydro dip a Yeti tumbler aren't difficult but there are a lot of common mistakes people make that lead to a bad paint job or a poor finish. You'll want to do it correctly to get the best results.
The instructions below will walk you step-by-step through exactly what you need to do to successfully hydro dip your Yeti cup or any other brand of tumbler. This works for Ozark Trail, RTIC, Hydro Flasks and any other stainless steel tumbler or bottle.
What Is Hydro Dipping?
Before we jump into it I want to quickly explain what hydro dipping is and how it works. By understanding how it works you're more likely to get a better end result, which is what we all want.
A did a full article on how does hydro dipping work if you want a more in depth guide but here's the basics:
Hydro dipping works by creating a film like layer of paint that floats on the surface of water. The paint is hydrophobic (oil-like) so it doesn't dissolve in the water but sits on top ready to stick to the next thing it touches.
As you push your tumbler cup through the paint the surface tension pulls the paint onto the cup and the paint is designed to permanently stick to the object, even after it's wet.
So once you push your Yeti tumbler through the surface whatever is painted on the cup will be permanent.
This is why it's super important to avoid air bubbles, water on top of the paint and other common mistakes people make when hydro dipping.
Video Tutorial
There are a lot of great video tutorials out there on hydro dipping that all walk through basically the same process. I found the video below to be quick, straight forward and provides all the details you need to hydro dip your Yeti.
Most images in this instructional guide are also taken from this video:
Ingredients Required:
- Your stainless steel tumbler cup (Yeti, Ozark Trail, RTIC or any other brand)
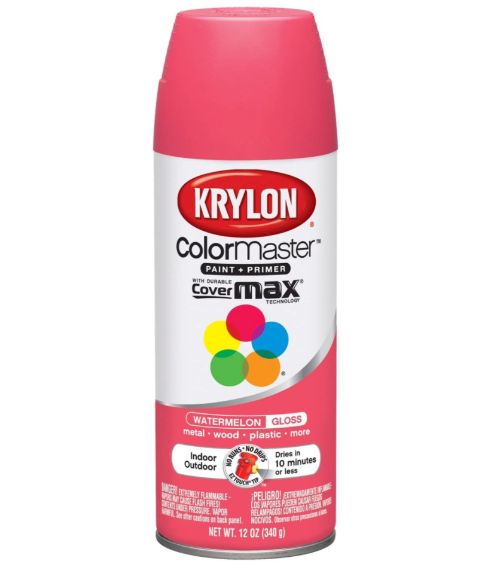
- High-gloss spray paints
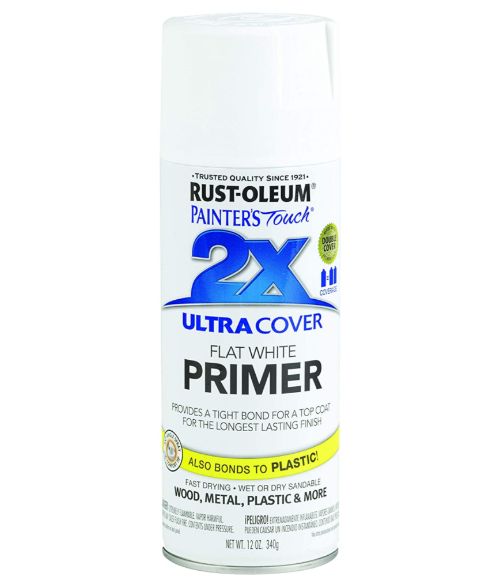
- White primer spray paint
- 2 part epoxy or epoxy spray
- Rubber gloves
- Plastic bag
- Painters tape
- Bucket (5 gallon or rectangular)
- Water hose
- Air hose or hair dryer
- Rubbing alcohol (optional)
1. Clean Cup Well and Dry

The first step is extremely important and that is to clean the outside of your tumbler extremely well.
You'll want to give it a good wash in warm soapy water making sure to give it a good scrub and remove any dirt or grime that has built up on the surface.
You'll then want to wash the soap suds off and either leave it to dry or dry it thoroughly with a towel.
Once dry you can give it a rub down with some isopropyl alcohol (rubbing alcohol) to make it especially clean.
Put it down somewhere where it won't get dirty while you prep everything else.
2. Apply Masking Tape To Areas You Don't Want Painted
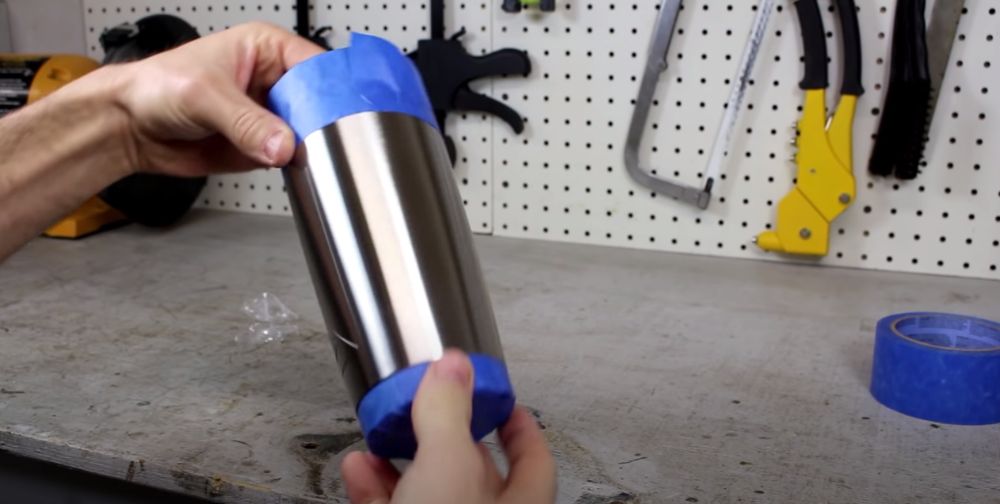
Next you'll want to take your painters tape, or masking tape, and tape it over the areas you don't want to get painted.
A lot of people like to cover the bottom of the cup with tape as they don't want to paint this, whereas some people just go ahead and paint the entire thing.
Others like to run a bit of masking tape over the top of the cup so their lips won't come into contact with the paint. I really like this idea but some other people don't worry about it.
It's completely up to you how you tape it.
See the latest prices for masking tape at Amazon
3. Put Lid Inside Plastic Bag And Place On Your Tumbler
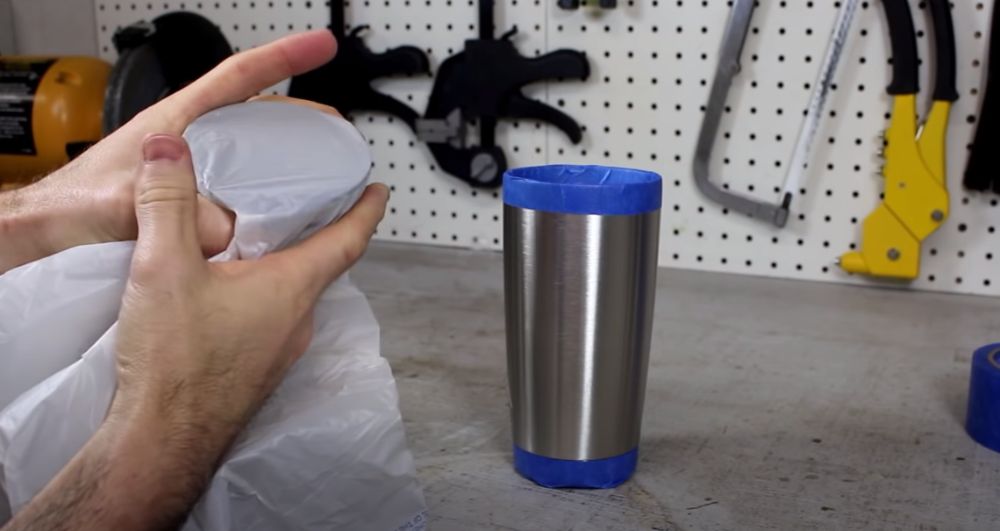
You don't want the inside of your tumbler to get any paint on it so it's important to create an air tight seal to stop any paint getting inside during the hydro dipping process.
The simplest way to do this is to take the tumbler lid and put it inside a plastic bag.
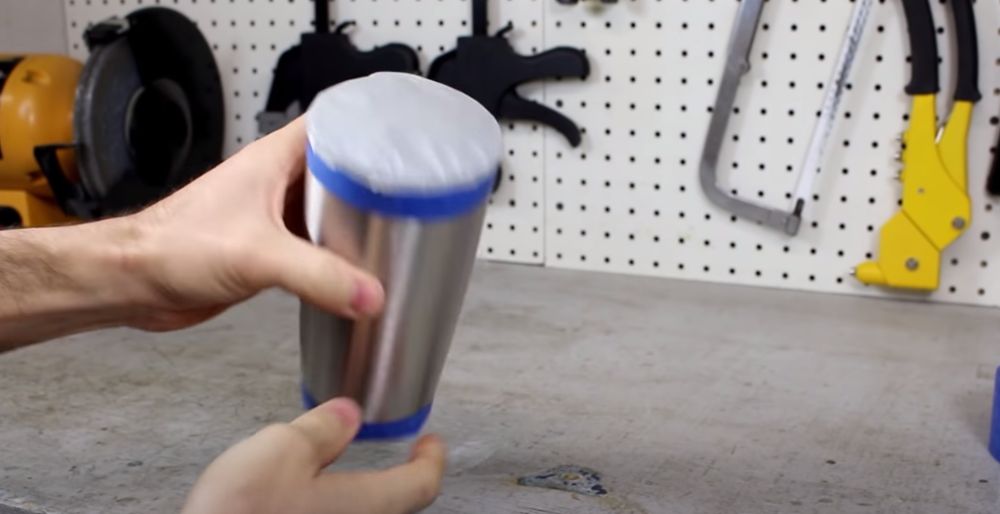
Then place the lid (that is now covered in plastic) in the tumbler to seal it. Any excess bag can just be pushed into the tumbler.
This should give you a good air tight seal and it won't paint the lid because it's protected from the plastic bag.
4. Apply White Base Coat To Tumbler and Leave To Dry
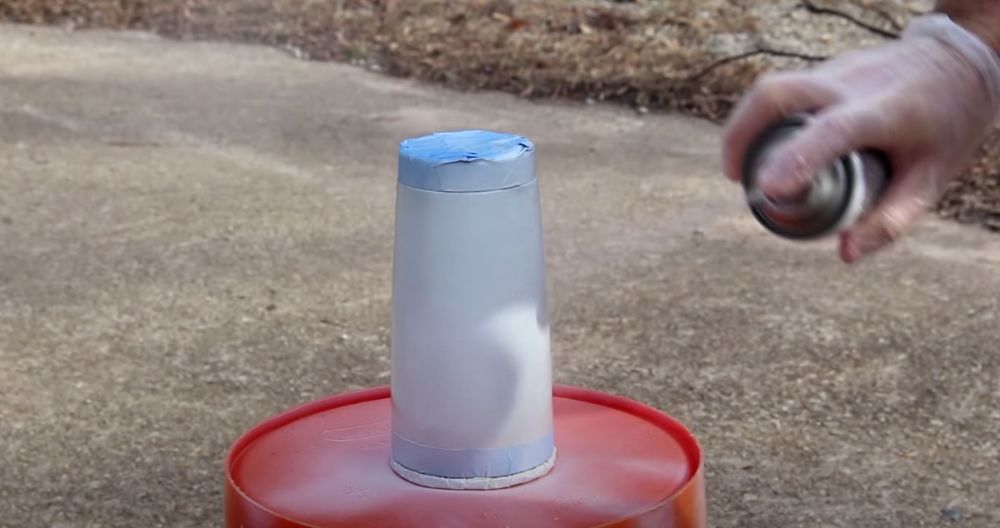
Next you'll want to apply a coat of white primer to your tumbler cup.
This helps the paint stick to it better and the white makes your colors show up better and brighter.
Technically you can skip this section and just hydro dip your tumbler without any primer at all, but your results likely won't be as good.
See the latest prices of primer sprays at Amazon
5. Fill Bucket With Water Nearly To The Top
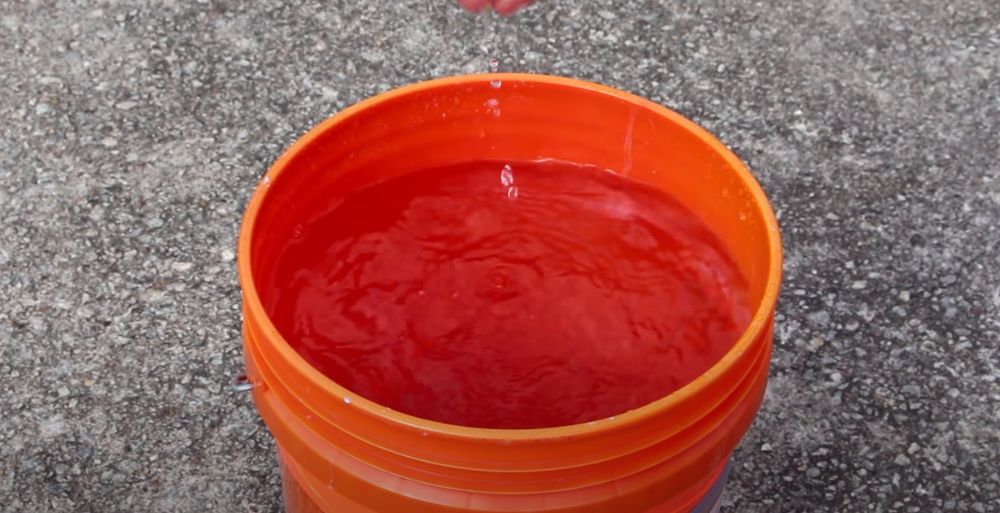
Now take your bucket and fill it nearly to the top with water. You can either use a round 5-gallon bucket or you can use a square plastic bucket. I personally prefer the square buckets.
You want it to be full enough that you can push your tumbler all the way through and it isn't going to hit is bottom.
Ideally you want your water to be around 75-90F (23-33ºC) as lukewarm water won't cool down or heat up the paint too much and will give you better results.
Some people use hot water out of the tap to achieve this, others boil a kettle while others just leave their bucket to warm up in the sun for an hour or so before adding the paint.
See my list of the best 5 gallon buckets
6. Use Gloss Spray Paint To Cover The Top Of The Water
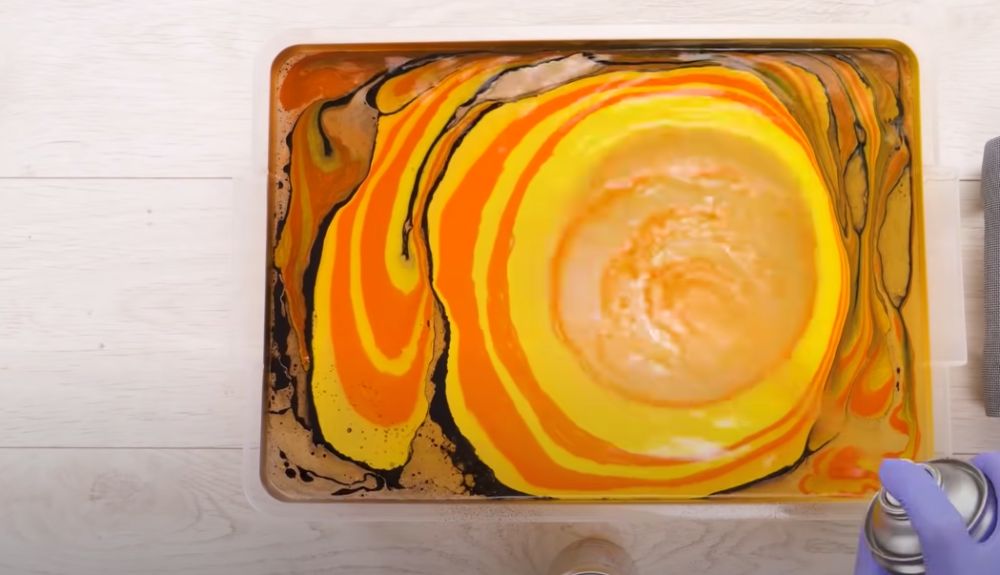
Now you want to spray your paint onto the surface of the water.
When spraying you want to avoid being too close to the water as this will create bubbles. You also don't want to be too far away or the paint will go everywhere.
Remember, the paint is hydrophobic. It doesn't mix with the water but instead creates a layer on top of the water (like oil does).
You want to create a layer that is thick enough to paint your entire cup (no leftover water spots) but not so thick that you'll get a blotchy paint job.
Add in the different colors until you get a design you're happy with.
See the variety of spray paint color options at Amazon
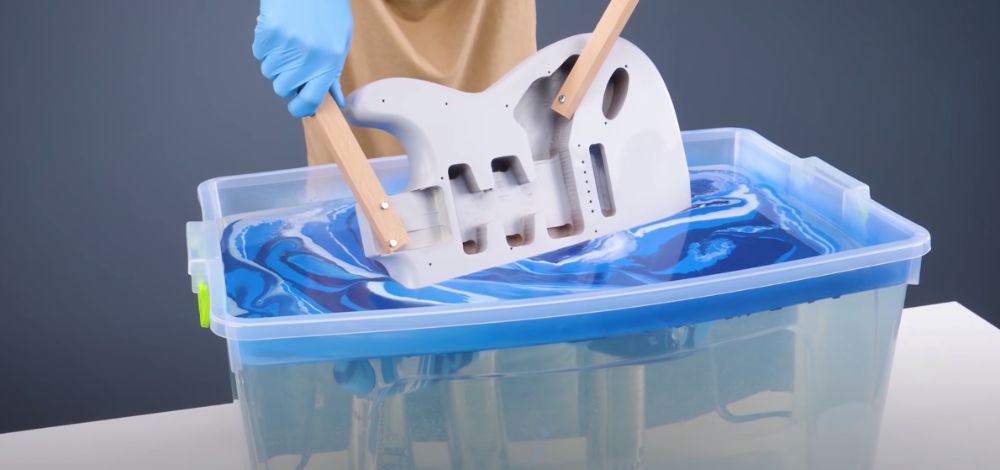
7. Lower In Tumbler Cup On an Angle (Maybe Twisting as You Lower)
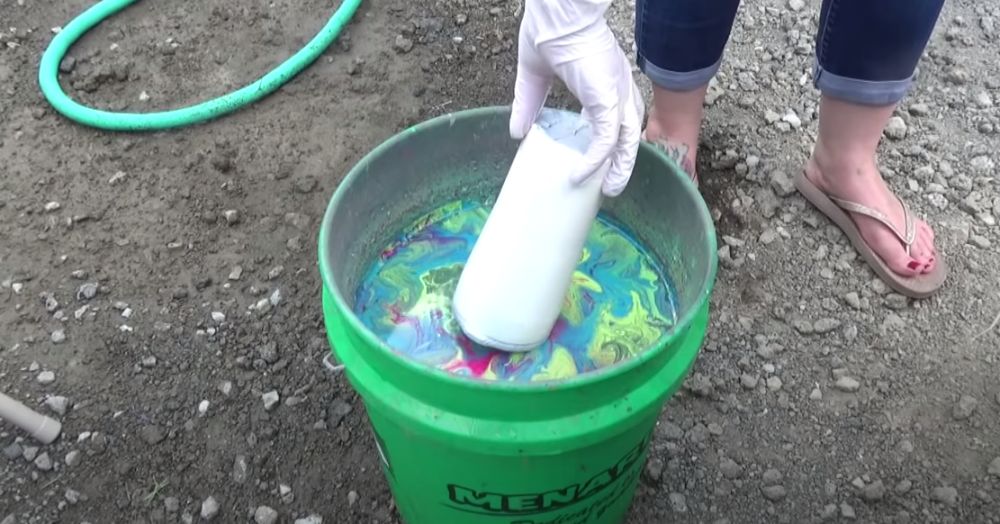
This is it! Time to hydro dip your tumbler. It's now or never and the way you dip it now will determine the look of your cup. This paint is permanent.
It's really important that you start your tumbler on an angle, don't put it in upright or sideways or air bubbles will collect under the tumbler and this will leak to a blotchy paint job.
Then lower the tumbler into the paint at a slow pace. Not a snails pace but a nice slow steady pace.
You can opt to twist your tumbler as you lower it to create a more swirled design, but you don't have to.
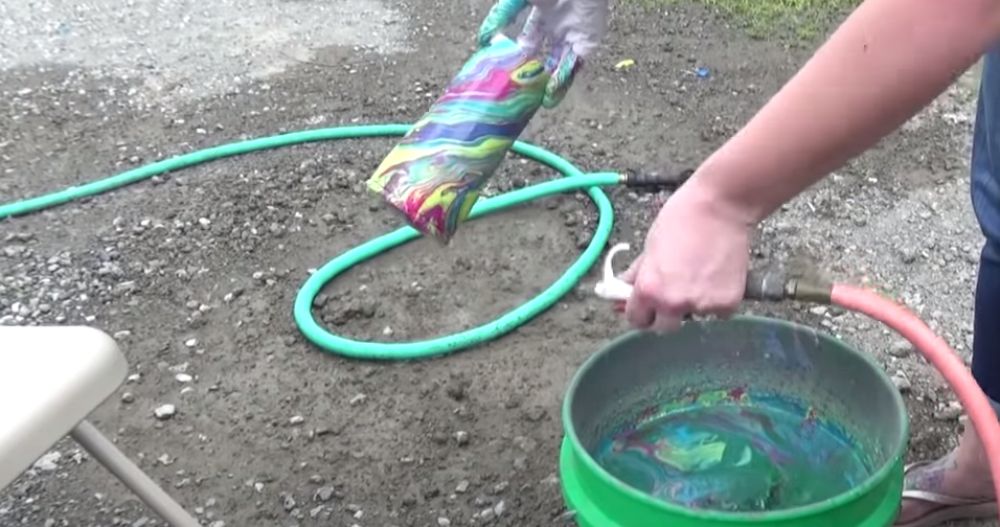
8. Break Surface Tension and Push Excess Paint Away

Now that your tumbler is fully submerged in the paint you'll want to use your hands to break the surface tension and push all the excess paint away before you pull your tumbler out.
You don't want that excess paint getting on your tumbler as you pull it back up out of the water as this will lead to weird blobs of paint on your otherwise awesome paint job.
8. Dry With Air Blower or Blow On It
Next you'll want to take an air blower and blow on the cup to pop any bubbles and dry it fairly quickly.
If you don't have an an air gun then you can use a hair dryer or you can just blow in it with your mouth.
9. Remove Tape As Paint Begins To Set
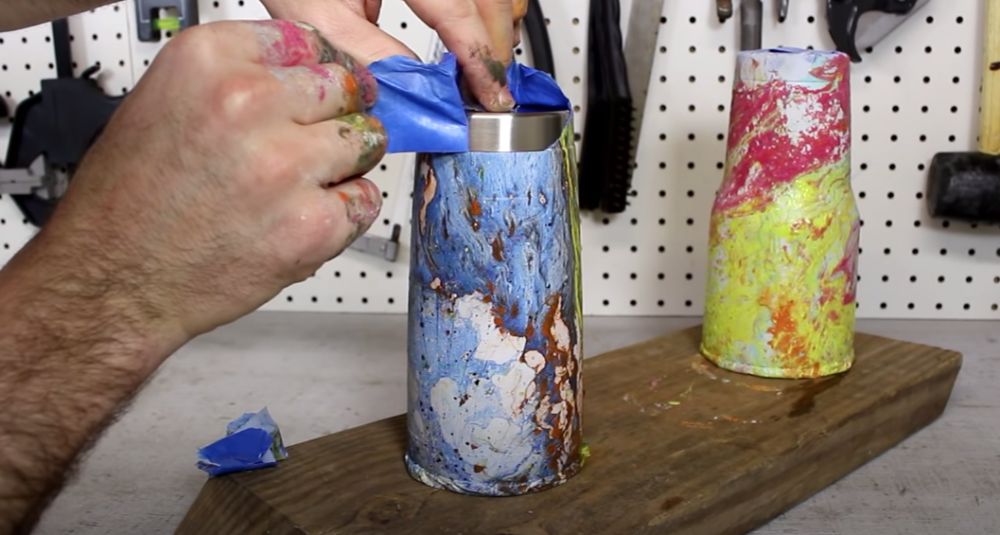
It can take some time for the paint to set but as it begins setting, but before it is completely set you'll want to remove the tape.
If you do it too early or wait too long then it can pull of pieces of tape and give you an uneven finish.
Once you've pulled off the tape leave the tumbler cup to dry for an hour or so. Technically you can stop there but over time the paint will scratch and come off quite easily so ideally we want to apply a protective covering over the paint.
10. Reapply Tape Leaving a Tiny Bit of Stainless Steel Showing
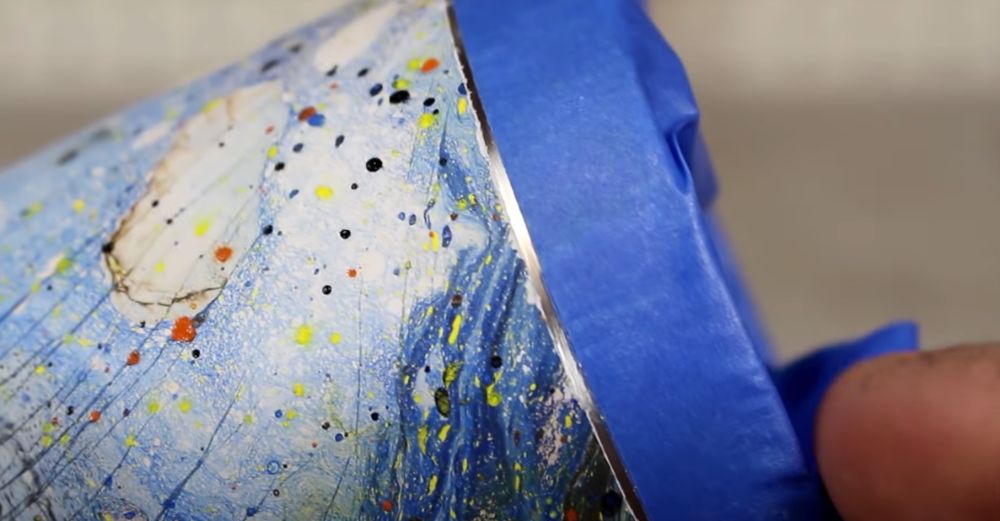
Once your tumbler is dry you now want to go ahead and retape it with fresh tape.
However, this time leave a tiny bit of stainless steel showing. This will allow the epoxy to cover all the paint and create a seal against the stainless steel.
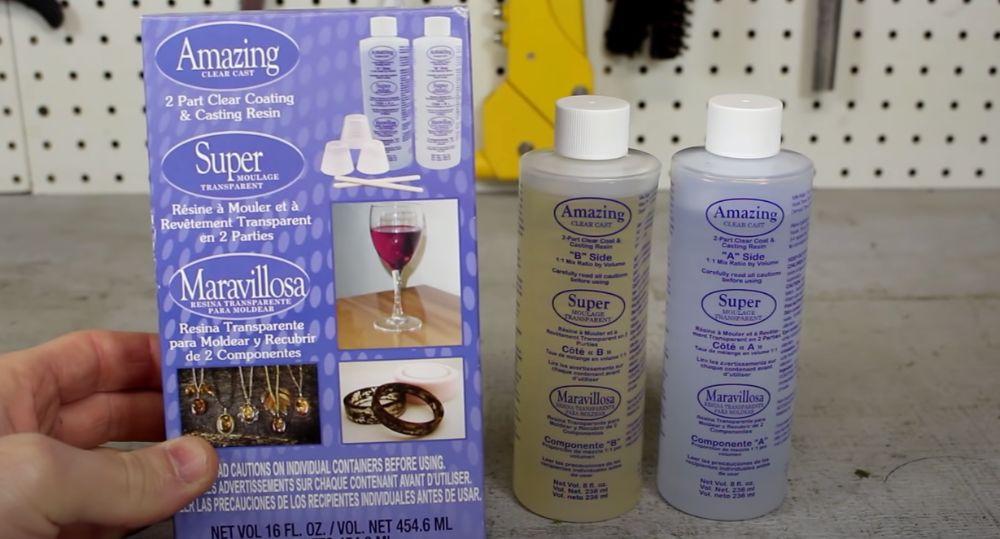
11. Apply Epoxy Resin To Seal The Cup
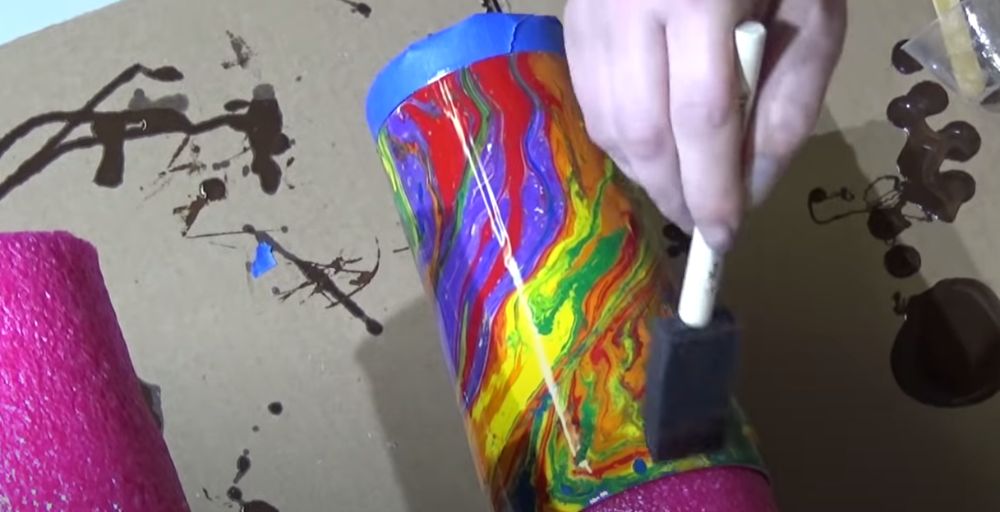
Now you'll want to go ahead and add a clear epoxy to the outside of your tumbler cup. This will both protect the paint from any scratches and it will also make the colors pop and make your tumbler look even better.
You can go with a simple spray can epoxy that'll give you a clear coating or for even better results a lot of people recommend this 2 part epoxy from Amazon (or craft stores) that gives a better result.
12. Continue To Rotate As Epoxy Dries
You want to avoid any dips or clumping in the epoxy so try to rotate it as it dries if you can.
Another Helpful Video:
While the top video was good, helpful and short I also really like the video below. It's a bit longer but you can see that the lady doing it is more experiences and she gets some pretty fantastic results: