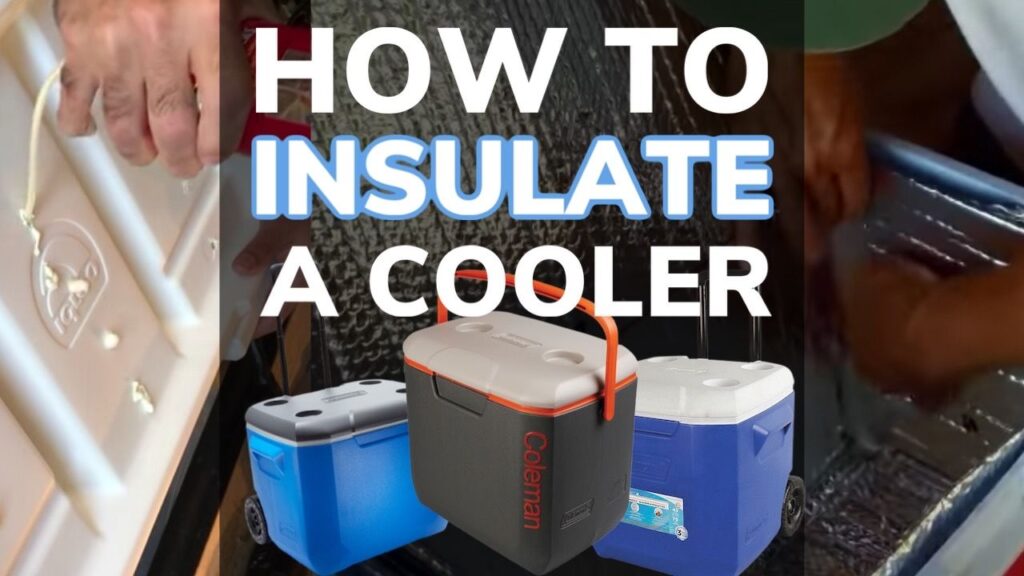
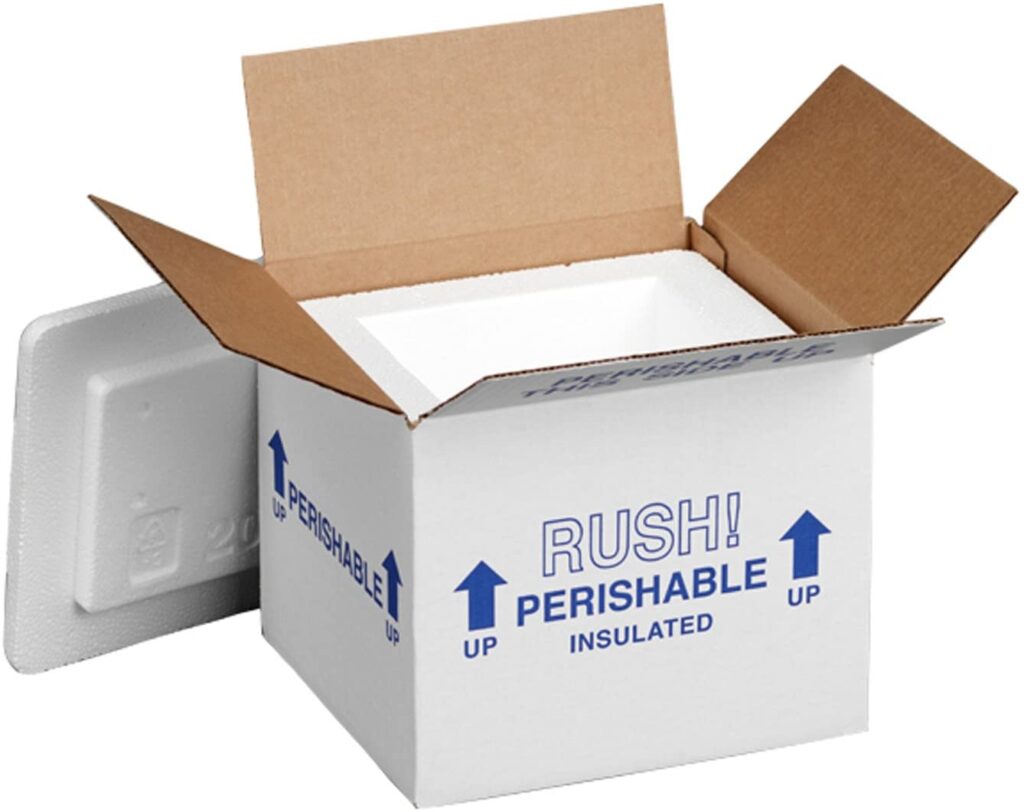
Rather than going out there and spending hundreds of dollar on an expensive cooler like Yeti there are simple, easy and affordable ways to insulate a cooler so it holds ice for longer.
By using these tips you can turn a cheap cooler that struggles to hold ice for a day into a cooler that can hold ice for multiple days at a time and even rival the performance of some of the high-end coolers.
So how do you insulate a cooler and what are the most effective methods of doing it?
To insulate a cooler so it hold ice longer add insulation to the walls using polystyrene board, fill the lid with insulation and add a reflectix cover and you'll get superior ice retention performance.
Do Cooler Hacks Actually Work?
First I want to look at whether or not these cooler hacks actually work.
There is no point spending time and money on adding insulation and hacks to your cooler if it isn't going to hold ice any longer.
Below you can see 2 different videos of people using cooler hacks to try and improve the performance of their coolers.
The first two videos were successful and the hacks helped their regular 1-day coolers hold ice for around 2.5 days in the summer heat. Definitely a success!
This next video was not so successful. He filled up the lid of his cooler with spray foam and also added a rubber gasket but in doing so he actually DECREASED the performance of his cooler.
The cooler without the extra insulation held ice longer than the cooler with the extra insulation.
When we get to talking about insulating the lid I'll explain why I think this happened and how you can avoid it.
So does adding extra insulation to your cooler cause it to perform better and hold ice longer?
The answer is yes it does, but only if you do it properly. If you do it properly your cooler will be able to hold ice for much longer, but if you do it incorrectly you may actually harm the performance of your cooler.
These improvements might not bring it up to the level of a Yeti cooler. Yeti coolers can hold ice for 5+ days, but it will improve it significantly.
1. Make The Walls of Your Cooler Thicker
The main thing that's makes Yeti coolers and high-end roto-molded coolers so effective at holding ice for such a long period of time is just how thick the walls of the cooler are.
Yeti, and similar, coolers have around 2-3 inches of insulation in the walls and floor of the cooler.
Cheaper coolers on the other hand usually only have around 0.5-1.25 inches of insulation in the walls and base of the cooler.
The below video shows just how effective basic thick insulation is at holding ice even without the outer plastic, gasket or any other fancy features. You can also look at my article on what Yeti coolers are made of.
How To Add Insulation To The Walls Of Your Cooler
Please note: Adding the below insulation types to the inside of your cooler will mean that your cooler with NOT be food safe. Don't eat the ice, drink the water or have food come in direct contact with these foams. More on styrofoam and food safety.
To add insulation to the walls of your cooler you'll want to get hard insulating foam board that you can cut to size. The most common options are:
- Styrofoam
- XPS (extruded polystyrene)
- Polyiso (Polyisocyanurate foam)
- Polyurethane foam
Styrofoam is the easiest to get and it's often free as you can use leftover styrofoam from product packaging or you can buy cheap styrofoam board or cheap styrofoam boxes/coolers.
XPS is more effective and can be purchased from any local hardware store as it's often used in building insulation. Polyiso is also good and often comes with a reflective layer which adds more insulation.
Polyurethane foam is the same foam they use in a Yeti cooler and is the most effective insulator. However it's also the most expensive.
Here are the steps of add extra insulation to the walls of your cooler:
- Measure the inside dimensions of your cooler making sure to measure and cut the bottom piece first
- Cut out the floor and side pieces from your foam board
- Place inside the cooler sticking it to the walls and floor using an all purpose glue if you wish to connect the pieces together as well as to each other
- Fill in the gaps where the pieces connect with duct tape, silicone or hot glue
- Optional: Paint interior with flex seal to seal it up
- Optional: Use a food safe vinyl or plastic to line the inside of the cooler so it becomes leak proof and food safe
2. Insulate The Lid with Spray Foam
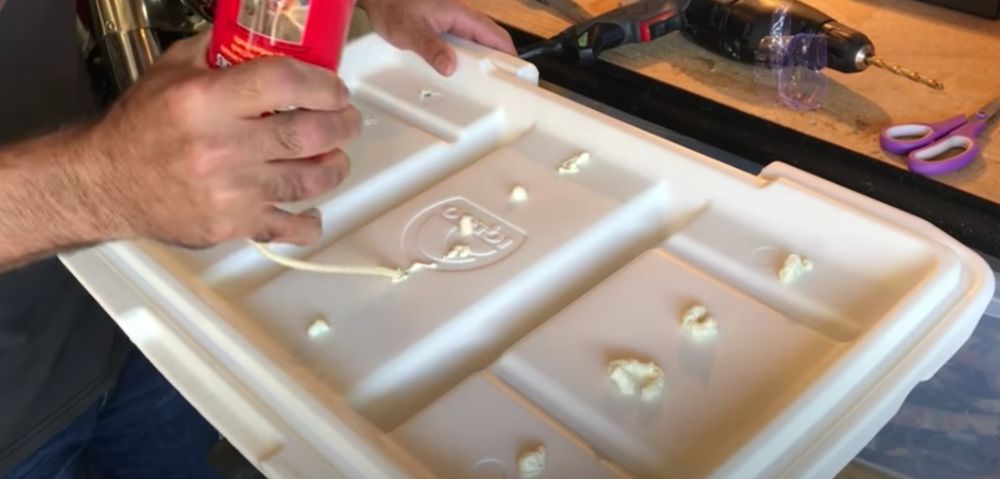
It may surprise you but the lids of cheaper coolers are generally completely empty and don't contain any insulation at all, only air!
So insulating the lid of your cooler is a great way to add extra insulation and keep ice longer.
When done correctly it can increase the ice retention capabilities of your cooler by 50-100%. So in some cases your cooler could hold ice up to twice as long.
However, don't incorrectly it can actually decrease the ice retention of your cooler. The using the wrong foam might not insulate your cooler but provide dense material for heat to easily move through, getting into your cooler and melting your ice.
IMPORTANT! Not all foams are created equal. Much expanding foam is designed to fill gaps and create seals not to insulate. You want to make sure your get a closed-cell polyurethane insulating foam as these insulate the best. Buying the wrong foam can decrease the performance of your cooler.
I recommend this Loctite Big Gaps spray foam which is designed to fill large areas and has a high densisty insulating structure. A lot of people use “Great Stuff” but from the research I've done that doesn't seem to work as well.
How To Insulate The Lid of Your Cooler With Spray Foam
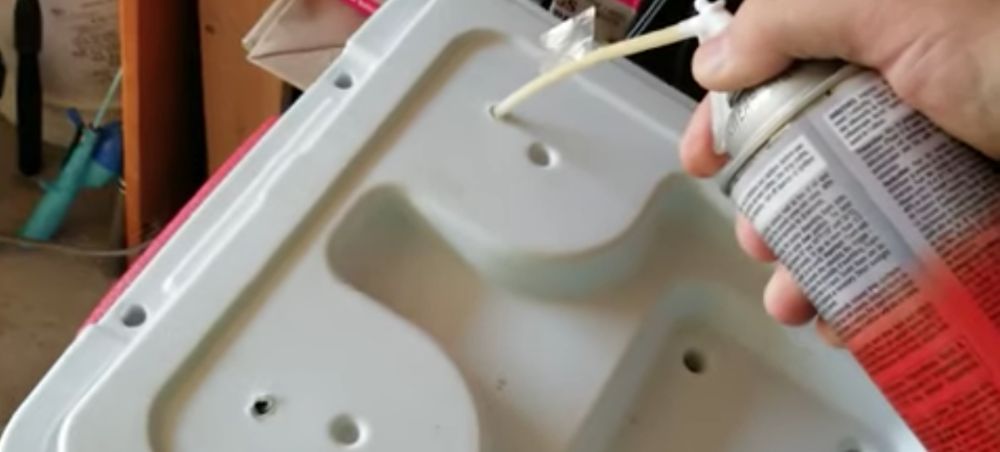
Insulating the lid of your cooler with spray foam is actually really easy
- Purchase a high-quality closed cell polyurethane spray foam like Loctite Big Gaps that is designed for insulation (not just filling gaps)
- Drill a couple of holes in your cooler lid slightly larger than your spray foam nossle
- Shake the can well
- Spray foam into the lid of the cooler and allow it to expand
- Foam will likely come out of the holes as it expands, this is normal. Just let it happen and leave it to dry.
- Leave 24-48 hours for the foam to cure and dry
- Break off and scrape away excess foam
- Seal off gaps with silicone or hot glue
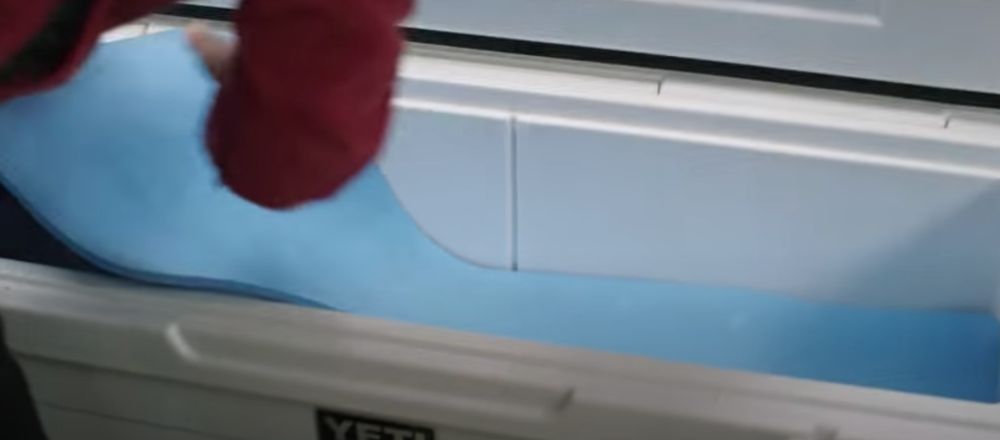
3. Insulate Your Lid With Foam Board

Instead of spraying the lid with spray foam like we talked about above you can use hard foam board and stick it on the inside of your cooler lid for extra insulation.
This is easier to do and if you've already got some foam board left from doing the sides then it often makes sense to do the lid as well.
It's not really possible to cover the entire lid in this, usually there is a central compartment that will fit a piece of foam. So it won't be perfect but it'll add some ice retention.
Combine this with putting spray foam in your lid and you can get really good results.
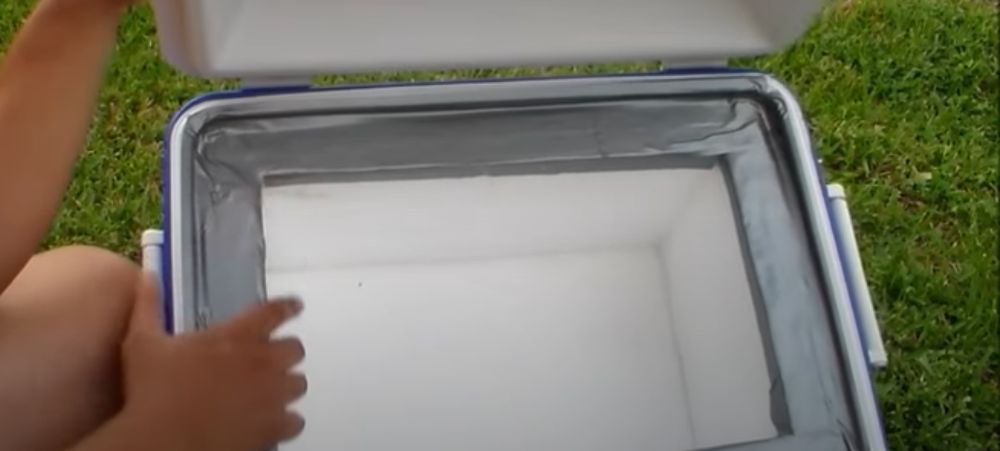
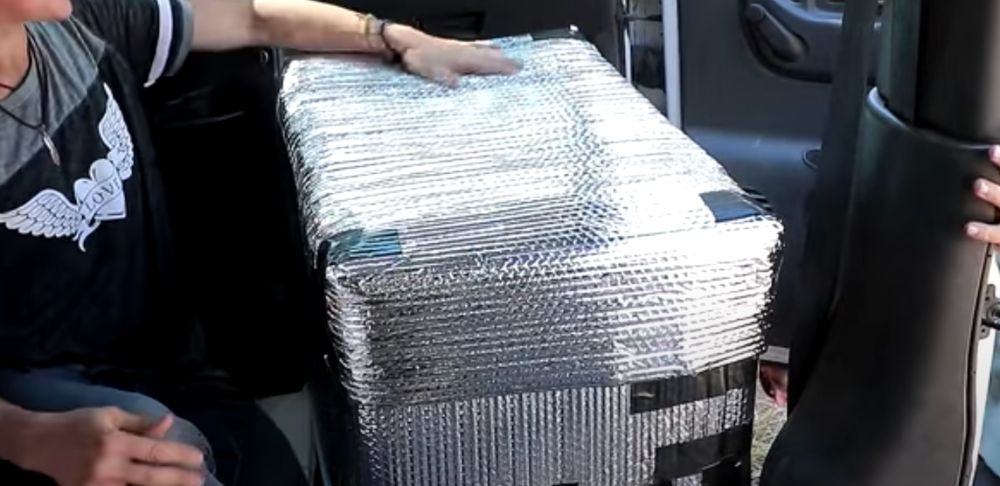
4. Line Your Cooler With Aluminum Foil/Reflectix/Bubble Foil
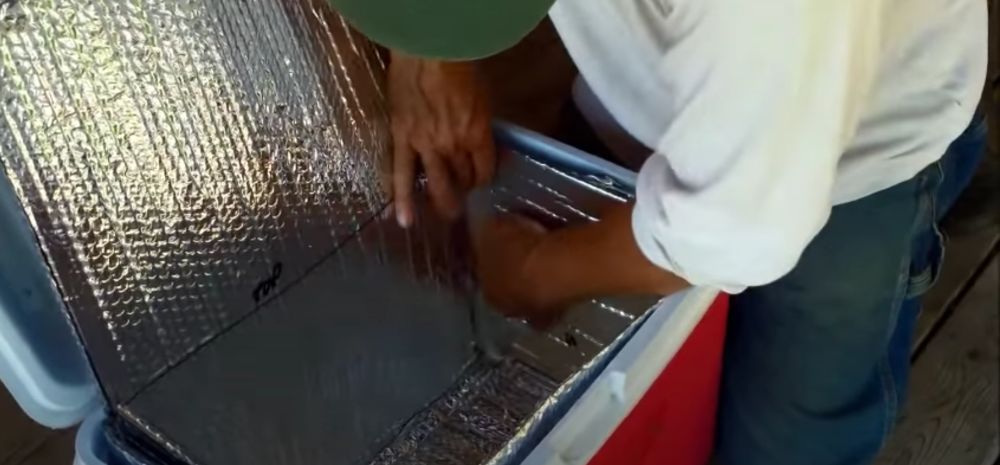
Another alternative to increase the insulation of your cooler is to line the inside of the cooler with reflectix or bubble foil.
This is insulation usually used in housing and roofing but it can also be effective in coolers.
It contains a reflecting side (usually of aluminum) that reflects heat radiation from the sun, helping to keep your cooler colder. You can get a small roll of Reflectix for cheap here at Amazon.
It also usually has some sort of bubble wrap where these bubbles act as an extra insulating layer.
There is a video below where someone explains exactly how to line the inside of your cooler like this:
You can also just use regular aluminum foil without any insulating bubble wrap and it will still reflect away heat radiation from the sun and help your cooler insulate a little bit better.
5. Make an External Cooler Cover with Reflectix/Bubble Foil
Another way to increase the insulation of your cooler is to make a cooler cover.
Instead of lining the inside of your cooler with extra insulation or bubble foil you can create an external cooler cover that can slide on and off your cooler and provide extra protection from the sun's heat.
To do this use a roll of reflectix/bubble foil that you can pick up for your local hardware store. Again you can get a good sized roll of Reflectix for a good price here at Amazon.
Wrap it around your cooler, cut to size and attach together ideally using some reflective tape (I find the ProShade reflective tape at Amazon both effective and affordable) or alternatively you can use duct tape.
Make sure to leave enough wiggle room so the cover can easily slide on and off your cooler.
Then cut a piece of the lid and also connect that together with reflective tape or duct tape.
You can either opt to make the lid of your cooler cover fixed in place so you have to remove the entire cover to access your cooler. Or you can make it so the lid of your cooler cover also opens so you can access your cooler without removing the cover. It's up to you.
Below is a great video of someone making a cooler cover for a 12 volt fridge in a campervan. The same strategy can be used to make a cover for your cooler.
6. Make a Gasket From Foam/Weatherstripping
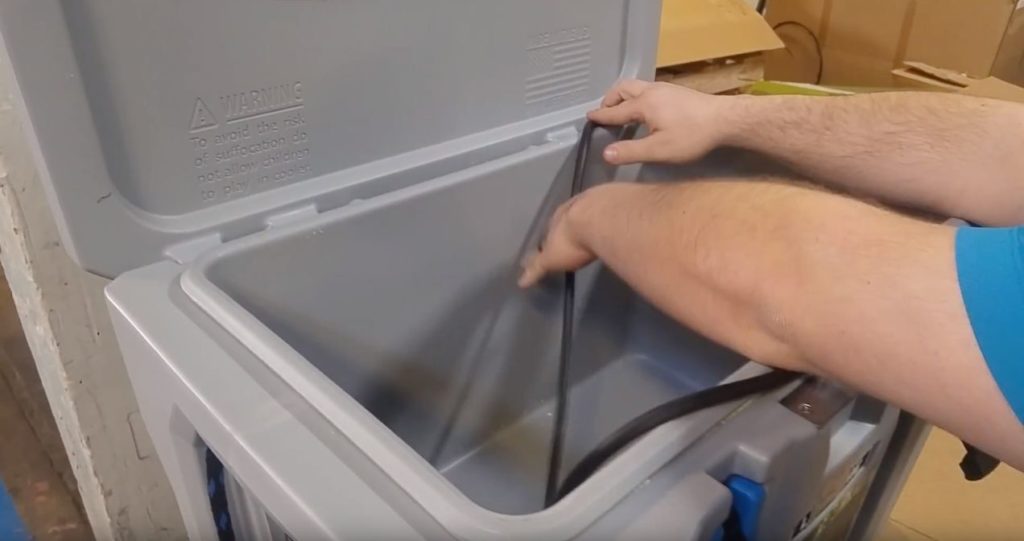
Another way high-end coolers like Yeti are able to hold ice much longer than regular coolers is that they have freezer-grade gaskets around the lid of the cooler.
This heaps to create a near airtight seal so that warm air can't easily get into your cooler and the cold air in your cooler stays cold.
You can add a gasket to your cheaper cooler easily by using some foam tape or weatherstripping.
You can buy weatherstripping where onside side is sticky. I like and recommend this foam tape as it's easy to use and comes in different thicknesses. It's also really affordable.
Run this foam tape around the top of your cooler so when you shut the lid it pushes on the foam tape and create a good barrier. This will help to keep the warm air out and help your cooler stay cold for longer.
7. Add Extra Layer of On Top Of Your Food and Fill Extra Space
Rather than completely modifying your cooler with thicker walls and spray foam in the lid you can simply add a layer of foam on top of your items in your cooler so it acts as an extra lid.
Dead air space in your cooler is the enemy of ice retention. I found this out when doing research on my article for the best coolers for ice retention.
The more dead space in your cooler the faster ice will melt. By adding a foam layer on top of your ice and food/drinks you're protecting it from the dead airspace.
This is super cheap and easy to do and you don't even need to modify your cooler. Just get a roll of foam and cut it to size.
A cheap yoga mat cut to size is one of the easiest ways to create this. Check out this affordable Yoga Mat at Amazon if you want to go that route.
8. Add Latches

Another thing high end coolers like Yeti has is latches to help hold the lid on tight and apply pressure to the rubber gaskets making it even more airtight.
You can easily add latches to your cheaper cooler for a couple of bucks and they work great.
These affordable metal cam latches at Amazon are easy to install and come in a variety of different sizes so you can choose the size that best suits your cooler.
9. Place a Small Cooler Inside a Large Cooler
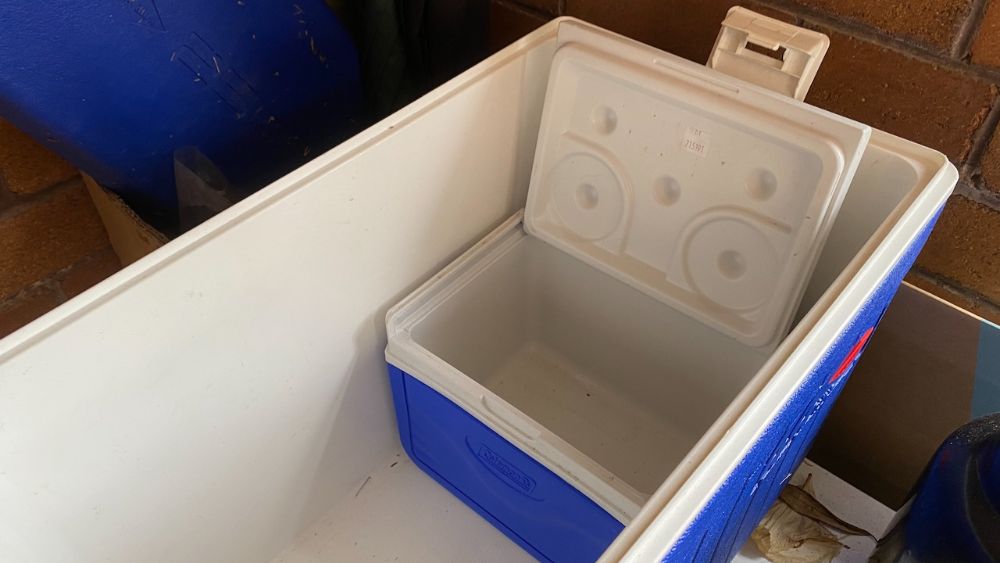
This method requires zero DIY skills and no modifications to either cooler.
All you need to do is take a large cooler and place and smaller cooler inside it. Then fill up your small cooler with ice and food.
If there are gaps between your large cooler and small cooler then you can also place ice or ice bricks in these gaps to help keep everything extra cold.
This creates an extra barrier for the heat to get through and can greatly increase the ice retention of your smaller cooler.
Once the ice/ice bricks between the coolers warm up you'll want to drain your cooler or take them out so they aren't helping to transfer heat into your smaller cooler.
10. Bury Your Cooler Partially In The Ground
If you're going to the beach or going camping and want your ice to stay frozen for longer then digging a hole and burying your cooler in the ground will help to naturally insulate it.
The heat from a hot day doesn't penetrate extremely far into the ground and the ground is often much cooler than the air above.
So by partially burying your cooler you're able to use the entire ground as extra insulation. This is obviously situational but can be really effective.
Also keeping your cooler in the shade and using other objects to shade your cooler from direct sunlight is another way to add a bit of insulation to your cooler and help it keep ice longer.