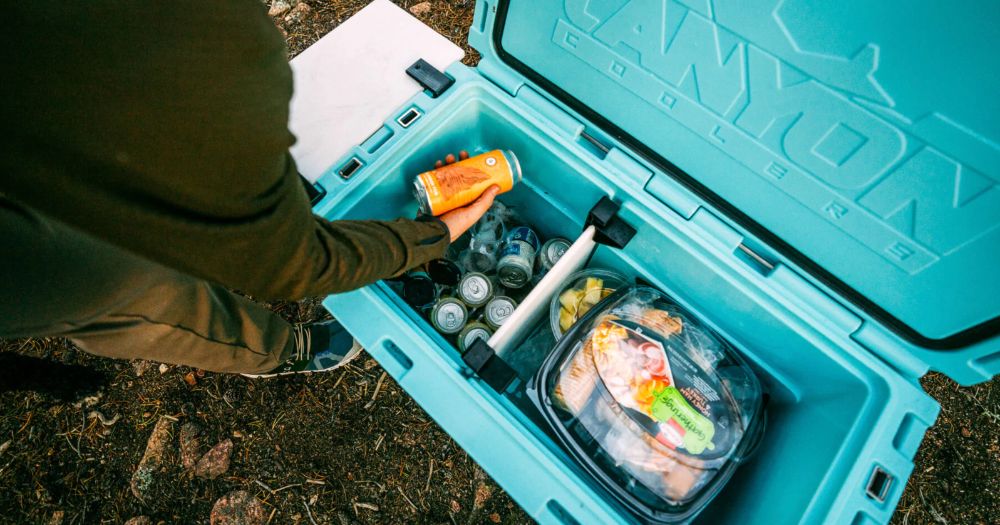
Whether you're tailgating, camping or having a backyard bbq or party there are a lot of times when you'll want to pack a cooler full of can. But how do you pack a cooler with cans and what's the best way to keep all the cans cold whilst maintaining ice the longest.
Luckily packing a cooler with cans is quite simple.
Metal cans conduct heat well and thus get cold quite easily, so you don't need to pack your cooler with cans in any particular way. Just ensure there is some ice touching all of, or most of, the cans and you'll be fine.
In this article we'll get into more details about how to pack coolers with cans if you're short on ice or if you want to keep ice longer but generally speaking as long as you don't bunch up your cans too much and spread your ice fairly evenly across the cans you're going to be fine.
Some Popular Ways To Pack a Cooler With Cans
There are a few different ways to pack a cooler with cans. Honestly, they all work fine and how you do it simply comes down to personal preference.
The Standing Stack
Create a layer of cans all standing up on the bottom of your cooler. Leave some space between the cans for ice to fit. The space doesn't have to be huge.
Stack cans on top of each other making tall towers of cans, each with spaces between them as previously mentioned.
Then pour loose ice into the cooler filling up the gaps between the cans.
Because ice is touching every can on the sides it will cool everything down nicely.
The Lazy Lie Down Ice Sandwich
Instead of stacking the cans on top of each other like some sort of fancy architect just do the lazy lie down.
Place a layer of cans on the bottom of your cooler lying down.
The place some loose ice on top of this bottom layer of cans before adding another layer of cans lying down.
Continue to add layers of ice followed by layers of cans to make your lazy lie down can and ice sandwich.
Just make sure you finish with a layer of ice on top. Consider it the icing on the cake (if you don't mind me mixing my metaphors).
The Bed of Ice
If you want your ice to last a bit longer and you've got enough to spare then instead of putting a layer of cans on the bottom (which will be hard to reach anyway) put a layer of ice on the bottom.
I call this the “bed of ice” and you can make it a thin layer or if you really want to retain your ice you can make it an extremely thick layer of ice.
Once you're bottom layer of ice is down the stack your cans using one of the methods mentioned up above.
How To Pack a Cooler With Cans When You're Low On Ice
When you're low on ice keeping all the cans in your cooler cold is going to be a tough job, especially if they aren't pre-chilled.
Cold sinks so if you're low on ice you're going to want to place all your cans in the cooler and then place a layer of ice on top.
I personally advise lying the cans down if you're low on ice instead of standing them up.
Placing a layer of ice on top serves two purposes.
Firstly the cold sinks which helps to cool all the cans in your cooler.
But secondly by lying all your cans down and having a layer of ice on top it's going to make the top layer of cans nice and cold and ready to drink.
The cans underneath won't be quite as cold (yet) but that's ok.
As you take a can from the top the ice will then fall down onto the next layer of cans cooling them down even further. This will continue as you drink more and more cans.
This is why lying cans down works best as the ice is more likely to stay on the top layer and not fall directly to the bottom of the cooler.
How To Fit The Most Cans Possible In a Cooler
If fitting the absolute most cans possible in a cooler is your number one priority and keeping them all optimally cold isn't as important to you then the strategy is simple – pack those babies in.
Stand Up Your Cans
You can stand up your cans. To do this completely fill the bottom layer with cans leaving as little space as possible.
Fit any ice into the gaps between the cans if there is space, otherwise these cans at the bottom will be hard to keep cold.
Then simply continue to add layers, stacking the new layer of cans directly on top of the bottom layer. Continue to place ice in gaps where possible.
If your cooler gets wider towards the top then you may want to deviate away from stacking the cans directly on top of each other.
If there is space at the top you can potentially lie cans down to fit more in, or use this space to fill with ice to keep everything cold.
Lie Down Your Cans
Just like the standing up method you can lie down your cans creating a complete layer of cans at the bottom of your cooler.
The continue to add layers of cans, stacking them on top of each other.
You won't be able to directly stack the like in the standing method, but rather they will fit into the grooves made by the previous layer.
Then add ice to any spare space in the sides of the cooler or on top of the cooler in order to cool everything down.
How To Keep Cans Cold Longer In a Cooler
If you're not careful and you don't follow the below steps you might find your ice melting quickly and your cans warming up and being unpleasant to drink.
But a few simple steps can help to keep your cans colder for longer so everyone is happy and no one has to drink warm beer or hot soda (gross!)
Pre-Chill Your Cans
This is the biggest tip and is going to have the biggest impact on how long your cooler holds ice and how long your drinks stay cold for.
If you're putting in room temperature cans then the ice needs to do a lot of work to bring those cans down to temperature.
This will melt a lot of your ice and your cans will become hot a lot faster.
Prechill your cans where possible so they are already cold when you put them in the cooler. You're introducing less heat into the cooler and thus they will stay cold longer.
Pre-Chill Your Cooler
If you have a high-end cooler like a Yeti then you'll want to pre-chill your cooler before putting your drinks and ice in it.
The thick insulation of these coolers can collect a lot of heat when they aren't being used and they can melt your ice pretty quickly.
So throw in a sacrificial bag of ice the night before to bring everything down to temperature.
Use More Ice
The greater your ice to drinks ratio the longer your drinks will stay cold.
A lot of drinks with a tiny bit of ice won't stay cold long, but a cooler full of ice so you can't fit any drinks is pretty useless.
If you just need the drinks to stay cold for an afternoon or evening then a 1:2 ice to drinks ratio will probably be fine. Otherwise a 1:1 or even a 2:1 ice to drinks ratio will keep everything cold for longer.
Place Ice On The Bottom
Placing the ice on the bottom of the cooler instead of the top will mean it get's less exposure to the outside air as the cooler is opened and closed and it will have less contact with the drinks.
It should still keep everything cold but it'll also stay cold longer.
Use Larger Blocks of Ice
Rather than just using loose ice also use some larger blocks of ice.
Frozen ice cream containers or milk jugs are great for filling up with water and freezing.